To set up SQL Server Installation for a 32 bit system go with the link given below
http://www.microsoft.com/download/en/details.aspx?id=29066
As like you can get the link as per system requirement for 64 bit system also.
ENU\x86\SQLFULL_x86_ENU_Core.box
ENU\x86\SQLFULL_x86_ENU_Install.exe
ENU\x86\SQLFULL_x86_ENU_Lang.box
Once the downloading part is completed , your screen will appear like this :
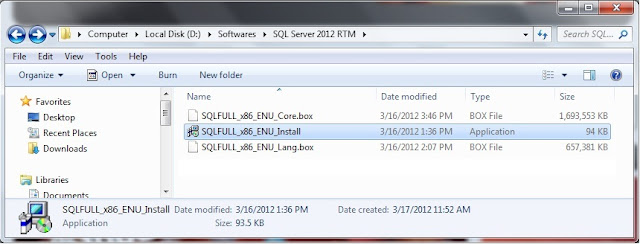
Click the
“SQLFULL_x86_ENU_Install.exe”, it will extract the required files for installation in the
“SQLFULL_x86_ENU” folder as appeared on the below screen :
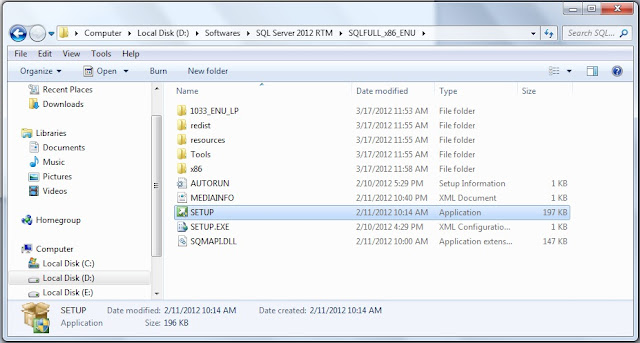
Now to set up an application click on
“SQLFULL_x86_ENU” folder.

It will check your system requirements for installation.
After this
“SQL Server Installation Center”
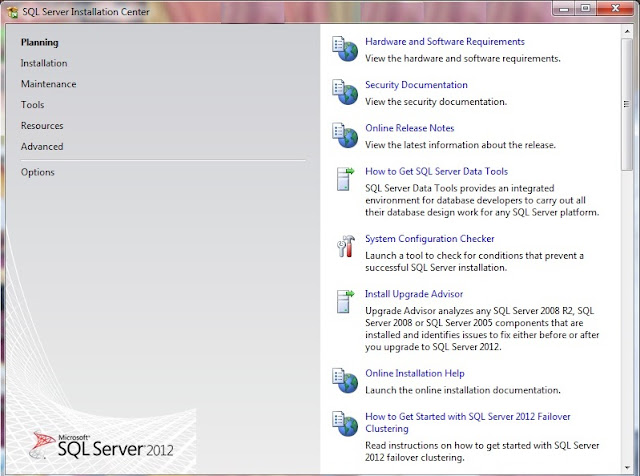
Click installation from the left pane and select
“New SQL Server stand-alone installation or add features to an existing installation”.
- In “Setup Support Rules” Click “OK” button when you have failed 0. Otherwise fix the issue and click “Re-run” button.
- Select by default edition “Evaluation”, or if you wish you can go with the “Express” edition.
- You can install “Offline” mode otherwise windows update automatically and will continue the process.
- Press “Next” button.
Select the “
SQL server feature installation” and click on
Next.
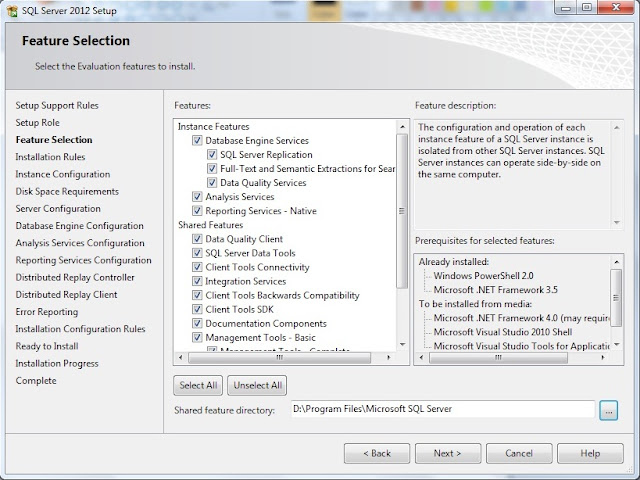
Select the shared features if you require and click on
Next.
Press
“Next” button if failed count is 0. You can select the
“Named Instance” and give the instance (server) name. Even you can change
“Instance root directory” if you want. Otherwise, press
“Next” button.
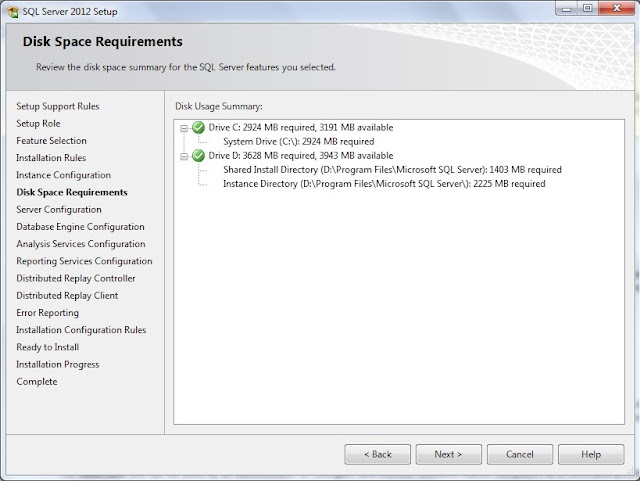 Note :
 It will not allow, if you do not have sufficient space in the disc. Click
Next.
You can change the
“Startup Type” for SQL services in the tab. Which also can be done in the Control Panel
“Services” after installation
.
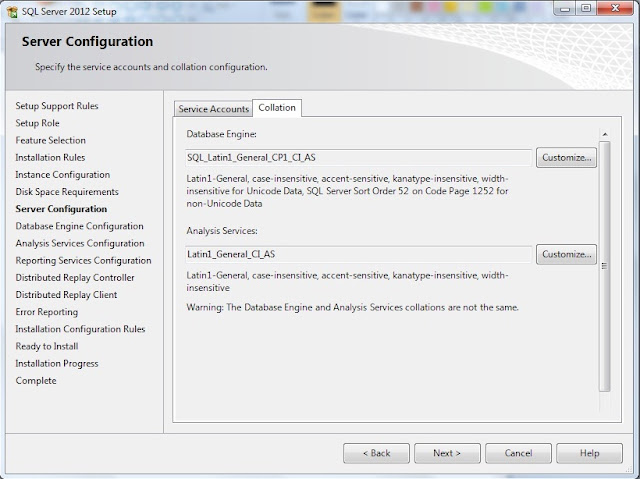
Change the “Collation” if you want, otherwise Press “Next” button.
Choose the authentication mode and specify the “Administrator” user. Here, I have selected “Add Current User”. Also, you can change the “Data Directories” and enable “FILESTREAM” if you want , otherwise Press “Next” button.
You can change the Analysis Services
You need to choose
“Reporting Services Native Mode” and press
“Next” button.
“Distributed Replay Controller” service feature is new in
SQL Server 2012, here specify the user who should have permission to use this service. Press
“Next” button.
 Note :Distributed Replay feature
 helps you assess the impact of future SQL Server upgrades.
- Specify the Controller Machine name which should have “Distributed Replay Controller” service. Also you can change the working directory and Press “Next” button.
- Press “Next” button, if failed count is 0 > Click on “Install”
After the successful installation, your screen should look like below :
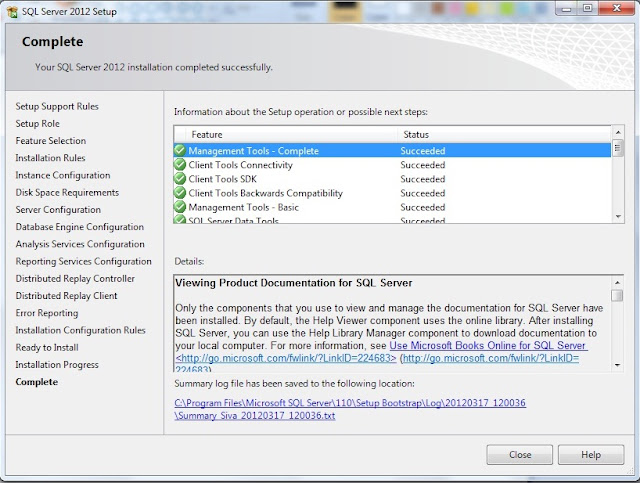
To confirm the successful of installation from the screen, you can find the
“Succeeded” for all the features and "
Close".
 Click the “SQLFULL_x86_ENU_Install.exe”, it will extract the required files for installation in the “SQLFULL_x86_ENU” folder as appeared on the below screen :
 Now to set up an application click on “SQLFULL_x86_ENU” folder.
 It will check your system requirements for installation.
After this “SQL Server Installation Center”
 Click installation from the left pane and select “New SQL Server stand-alone installation or add features to an existing installation”.

 Select the shared features if you require and click on Next.
Press “Next” button if failed count is 0. You can select the “Named Instance” and give the instance (server) name. Even you can change “Instance root directory” if you want. Otherwise, press “Next” button.
 Note : It will not allow, if you do not have sufficient space in the disc. Click Next.
You can change the “Startup Type” for SQL services in the tab. Which also can be done in the Control Panel “Services” after installation.
 Change the “Collation” if you want, otherwise Press “Next” button.
Choose the authentication mode and specify the “Administrator” user. Here, I have selected “Add Current User”. Also, you can change the “Data Directories” and enable “FILESTREAM” if you want , otherwise Press “Next” button.
 Note : You can select only one server mode to use: “Multidimensional and Data Mining Mode” or “Tabular Mode”. If you want both, you need to run the setup again after the first instance setup.
 Note :Distributed Replay feature helps you assess the impact of future SQL Server upgrades.
 To confirm the successful of installation from the screen, you can find the “Succeeded” for all the features and "Close".